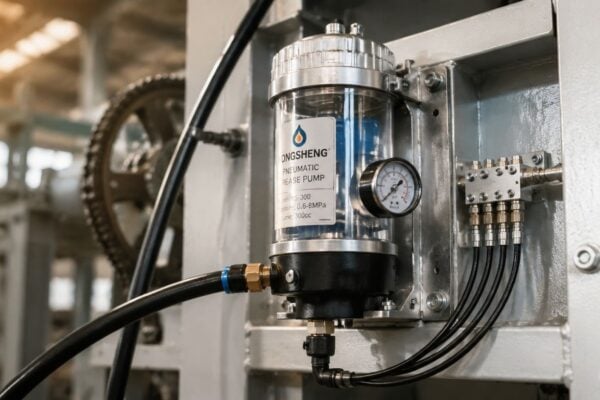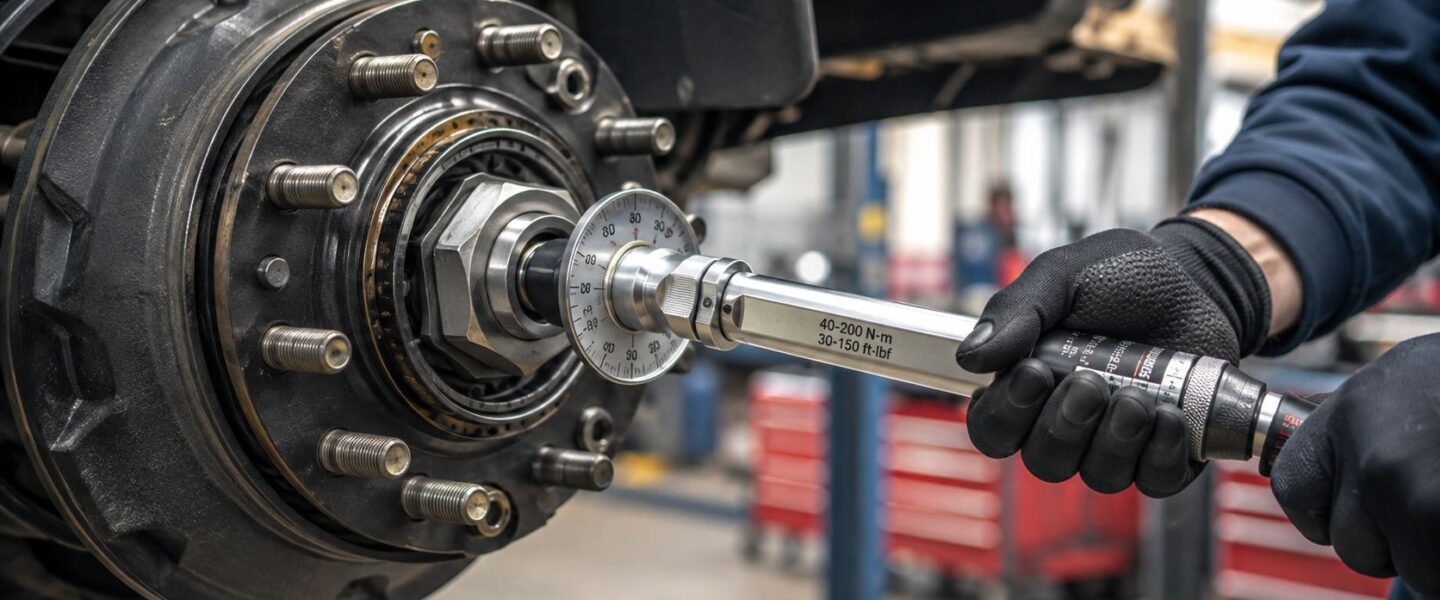
A loaded yard truck arrives on a flatbed after a wheel-end failure near a tank farm. The technician followed the service manual, used the listed axle shaft nut torque, and recorded the wrench reading. Yet the hub still developed movement, the bearing overheated, and the spindle nut backed off. That outcome is familiar to maintenance teams because a correct torque reading doesn't guarantee correct bearing preload.
Axle shaft nut torque controls more than fastener tightness. It influences bearing preload, hub retention, endplay, rolling resistance, seal loading, and the way the wheel-end carries radial and axial loads. Thread friction, lubrication, component condition, retention hardware, and the tightening sequence all affect the final mechanical state.
The practical question isn't, “What number belongs on the torque wrench?” It's whether the assembled hub has reached the correct preload and retention condition for that exact axle, bearing design, service history, and operating environment.
Table of Contents
- Why Axle Shaft Nut Torque Is a Reliability Decision, Not Just a Number
- Preparing the Fastener, Hub, and Workspace Before the Wrench
- Torquing the Nut to Set Correct Bearing Preload
- Choosing the Right Method for Your Hardware and Application
- Verifying the Clamp Load and Reading the Hub After Service
- Common Mistakes and the Failure Modes They Create
- When Recurring Axle Nut Issues Signal a Bigger Reliability Problem
Why Axle Shaft Nut Torque Is a Reliability Decision, Not Just a Number
The failed yard truck illustrates the central problem. The technician's wrench setting was correct, but the joint may still have had contaminated threads, a damaged locking feature, a settled bearing, or a hub and spindle condition that no longer matched the original service assumption. A torque wrench measures applied resistance. It doesn't directly measure clamp load or bearing preload.
Axle nut values vary dramatically across designs. An independent guide compiled by SKF lists some front and rear axle applications as low as 4 ft-lb and as high as 27 ft-lb, while another SKF-based guide shows many passenger-vehicle applications in a much higher range of roughly 26 to 244 ft-lb, depending on model year and platform. A broader automotive service reference identifies common axle nut specifications from about 130 to 300 ft-lb, reinforcing that no universal value is safe (SKF axle nut torque specification guide).
What the torque value is really controlling
An axle nut often forms part of the bearing retention and preload system. Preload is the controlled internal force applied to bearing components so they remain properly located without excessive drag. On a tapered roller bearing, the setting determines how firmly the rollers contact the races and how much axial movement remains in the assembly.
Under-torque can leave excessive endplay, permit hub movement, and allow the inner race to shift or spin on the spindle. That movement can produce fretting, brinelling, and damaged splines. Brinelling means permanent indentation of a bearing race caused by concentrated loading or impact. Over-torque creates the opposite problem, increasing drag, heat, grease breakdown, and seal wear.
Practical rule: The torque reading is an input. Correct endplay, smooth rotation, and secure retention are the acceptance criteria.
A reliability review should therefore examine contributing factors rather than blame the last person holding the wrench. The contributing factors framework helps separate the immediate fastening action from the conditions that allowed the failure.
When the printed specification deserves scrutiny
An OEM value should remain the starting point, but recurring failures can show that the service process no longer reproduces the intended assembly state. A replacement hub with different friction characteristics, corrosion on the spindle, repeated disassembly, or a changed retention method can make a nominally correct procedure unreliable.
Historical service data supports this caution. A Nissan technical bulletin archived by the U.S. National Highway Traffic Safety Administration increased the required torque for specific 5/8-inch rear axle shaft flange mounting stud hardware to 145 to 175 ft-lb, demonstrating that manufacturers can revise fastening requirements when design validation or field experience warrants stronger retention (NHTSA Nissan technical bulletin).
Preparing the Fastener, Hub, and Workspace Before the Wrench
No torque value can compensate for a damaged thread, incorrect hardware, or an unsupported hub. Preparation determines whether the specified torque can produce a repeatable mechanical result.
Start with the service-data lookup. Confirm the OEM manual, axle build date, drivetrain, axle position, and exact hub architecture. A spindle nut threads onto a spindle and commonly adjusts a serviceable bearing. An axle nut may retain a drive flange or an integrated hub bearing. An integrated bearing retainer may follow an entirely different procedure. Two units in the same fleet can carry different specifications across model years.
The pre-torque inspection
Use the following sequence before selecting a socket:
Identify the retention design. Confirm whether the assembly uses a spindle nut, drive axle nut, prevailing locknut, cotter pin, tab washer, or staked collar. The locking method determines whether the nut can be reused and how final security is established.
Reject questionable hardware. Inspect the nut, washer, and locking feature for stripped threads, stretched threads, corrosion, distorted staking, and damaged tabs. Critical wheel-end hardware shouldn't be reused when its locking function has been compromised.
Inspect the spindle and bearing. Look for galling on the threads, fretting around the keyway, scoring on bearing seats, heat tint on the bearing cone, race spalling, and evidence of lubricant contamination. Heat tint indicates that the bearing has experienced abnormal temperature, even if the failure isn't yet obvious.
Verify the tool. Check the torque wrench calibration sticker, usable range, condition, and zero setting. A wrench that operates outside its suitable range can provide poor control even when its calibration status is current.
Stage the process equipment. Prepare the correct socket, calibrated angle gauge if specified, replacement lock hardware, clean lubricant approved by the OEM, and a way to rotate the hub without creating an unstable lifting condition.
Control the workspace. Keep the work area level, set the parking brake, and chock the opposite wheels. The hub must be supported safely while it's rotated and measured.
The purpose of cleaning isn't cosmetic. Dirt, corrosion, and old lubricant alter friction at the threads and mating faces, changing how much of the wrench effort becomes useful clamp load. The same concern applies to grease handling. A maintenance planner should define the approved lubricant and application method, including the grease gun tube handling practice used by the site.
Torquing the Nut to Set Correct Bearing Preload
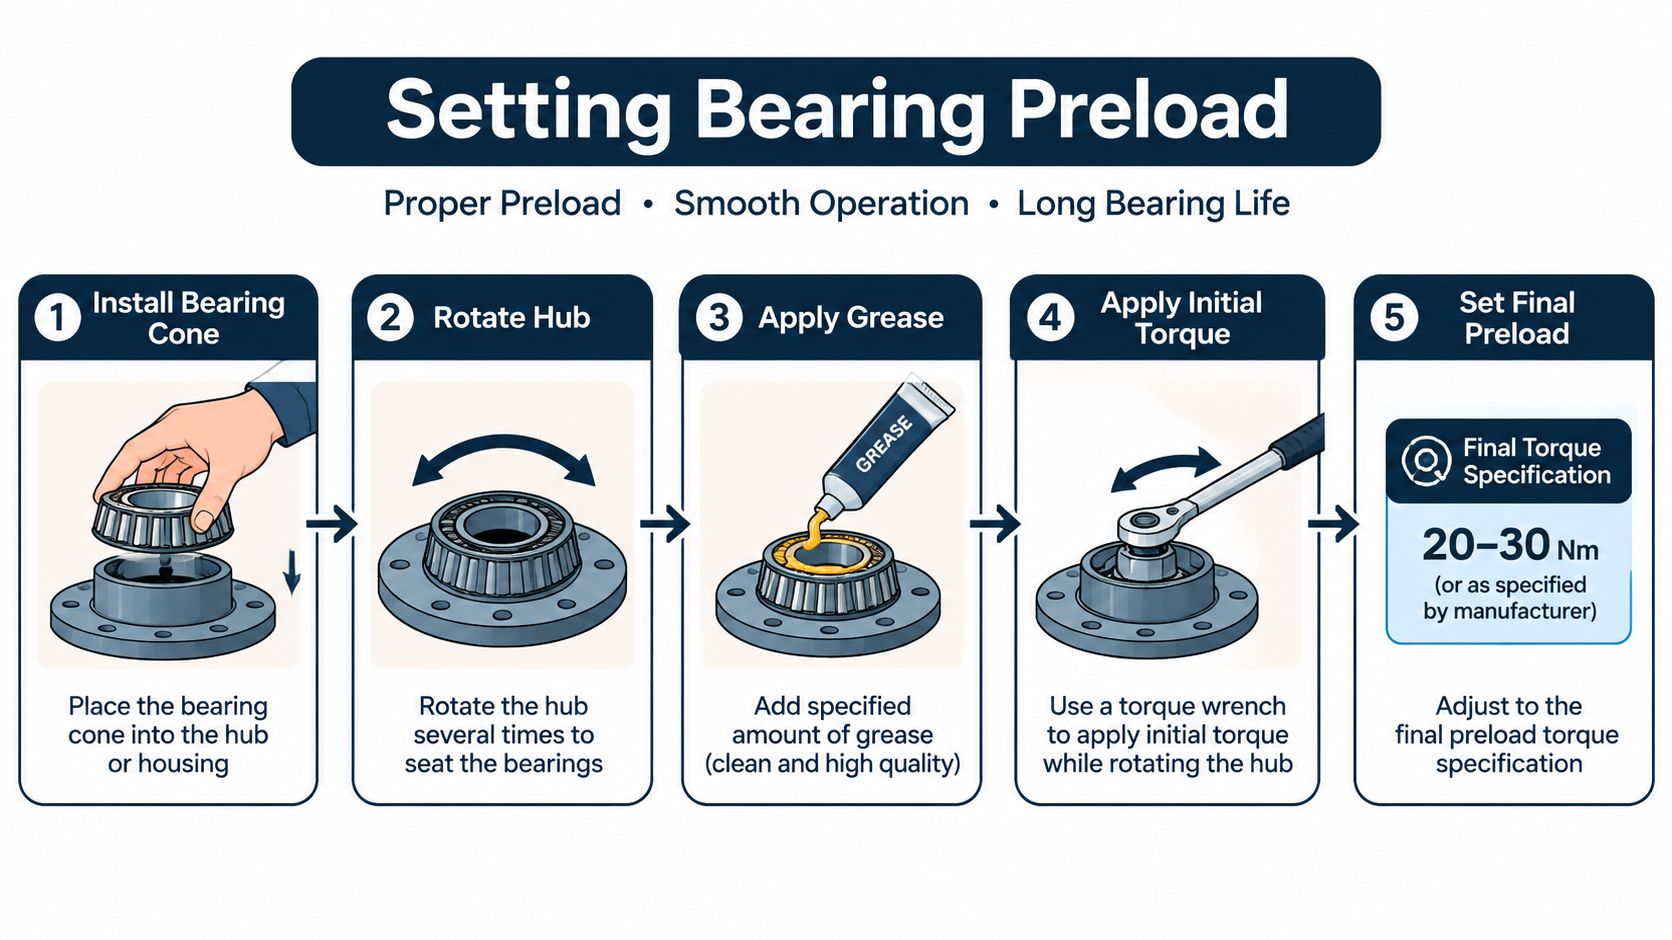
A typical tapered roller bearing adjustment isn't completed with one tightening pass. OEM-style procedures commonly seat the bearing at a high torque, rotate the hub to settle the rollers, back the nut off, and then establish a lower final setting. One SKF procedure, for example, specifies 200 ft-lb for seating, followed by a controlled back-off and 50 ft-lb while the wheel rotates. The exact back-off depends on the assembly and thread pitch, so the service method remains specific to the axle (SKF torque and bearing adjustment guide).
A controlled adjustment sequence
Seat the bearing components. Install the bearing cone, washer, nut, spacer, and other specified parts in the correct order. Tighten only enough to remove obvious looseness before starting the formal procedure.
Rotate the hub several turns. Rotation allows the rollers to settle against the races and distributes grease across the contact surfaces. Without rotation, static friction can make the nut feel tight before the bearing components are properly seated.
Apply the initial seating torque. Use the OEM value and increase the load in controlled stages where the procedure permits. Some procedures use an initial range around 50 to 100 ft-lb, but that range isn't a substitute for the exact service instruction.
Back the nut off as specified. A controlled back-off, often described by the OEM as a fraction of a turn, releases the static friction created during seating. The nut isn't being loosened casually. This is a deliberate step in resetting the bearing to its intended operating clearance.
Apply the final setting. If the manual specifies a final torque, use a calibrated wrench. If it calls for torque plus angle, mark the nut and spindle, apply the specified low seating torque, and rotate the nut through the required angle with a calibrated gauge.
Check the mechanical result. Rotate the hub by hand. It should move smoothly, without binding, roughness, or perceptible endplay. A high torque reading isn't a pass if the hub drags or the bearing remains loose.
The distinction between radial and axial loading matters during diagnosis. Radial load acts perpendicular to the shaft, while axial load acts along it. Bearing adjustment affects how the assembly responds to both, which is why the radial versus axial load reference is useful when reviewing a recurring wheel-end problem.
Staked nut control
A staked nut requires a separate retention step. The collar must align with a clean, undamaged notch or locking area. It shouldn't be forced over a fatigued thread or rest on a previously deformed section.
Some manufacturers specify a distinct value for staked nuts. One NHTSA bulletin identifies 270 Nm, with a permitted +27 Nm tolerance, for a particular staked-nut application (NHTSA staked-nut service bulletin). That value applies only to the specified design. It doesn't authorize transferring the number to another axle.
Choosing the Right Method for Your Hardware and Application
Maintenance planners should match the procedure to the retention architecture, not to the apparent size of the nut. A torque-only method, torque-plus-angle method, and staked-nut method each manage friction, preload, and loosening risk differently.
| Method | Typical Hardware | Best Application | Verification Required | Reuse Policy |
|---|---|---|---|---|
| Torque-only | Locknut, castle nut with split pin, or specified washer | Applications where the OEM publishes one final value | Final torque, smooth rotation, and retention check | Follow the OEM rule. Replace damaged or one-time-use hardware |
| Torque-plus-angle | Nut and spindle or joint designed for controlled rotation after seating | Tapered roller assemblies where the service method manages friction variation | Initial torque, hub rotation, specified angle, and final preload check | Use the OEM replacement requirement |
| Staked or crimped nut | Ductile collar, machined notch, or crimping surface | Drive axle and heavier wheel-end assemblies exposed to vibration and cyclic load | Final torque, endplay or rotation check, and confirmed stake | Replace when specified, and never stake over damaged threads |
Torque-only arrangements
Torque-only is appropriate only when the OEM defines it for that exact axle. A split pin or prevailing locknut may provide the retention, but the locking feature doesn't correct an incorrect preload. A lighter trailer axle can use a single published value, while a process trailer with repeated brake work may require new cotter or locking hardware at every intervention.
Torque-plus-angle arrangements
Torque-plus-angle uses an initial torque and then a specified rotation. Angle tightening controls the additional nut movement after the joint reaches a defined seating point. It can improve repeatability when thread friction varies, but it still depends on clean mating surfaces, correct component stack-up, and an accurate angle measurement.
Staked and tab-locked designs
Staked nuts and tab washers suit assemblies where vibration and cyclic braking loads make positive mechanical retention important. Heavy yard trucks may use a stamped collar that locks into a spindle feature, while heavy equipment may use a keyed washer and tab washer. The lock feature doesn't replace the preload check. It preserves the setting after the bearing has been correctly adjusted.
A practical example is a plant process trailer that receives frequent hub and brake service. Its maintenance standard may require replacement locking hardware at every intervention because repeated bending can weaken a tab or cotter component. The right decision comes from the axle part number and service manual, not from whether the old hardware appears visually acceptable.
Verifying the Clamp Load and Reading the Hub After Service
A torqued nut isn't necessarily a correctly preloaded bearing. Verification should confirm the hub's behavior after assembly, because friction can separate the displayed wrench value from the actual clamp load.
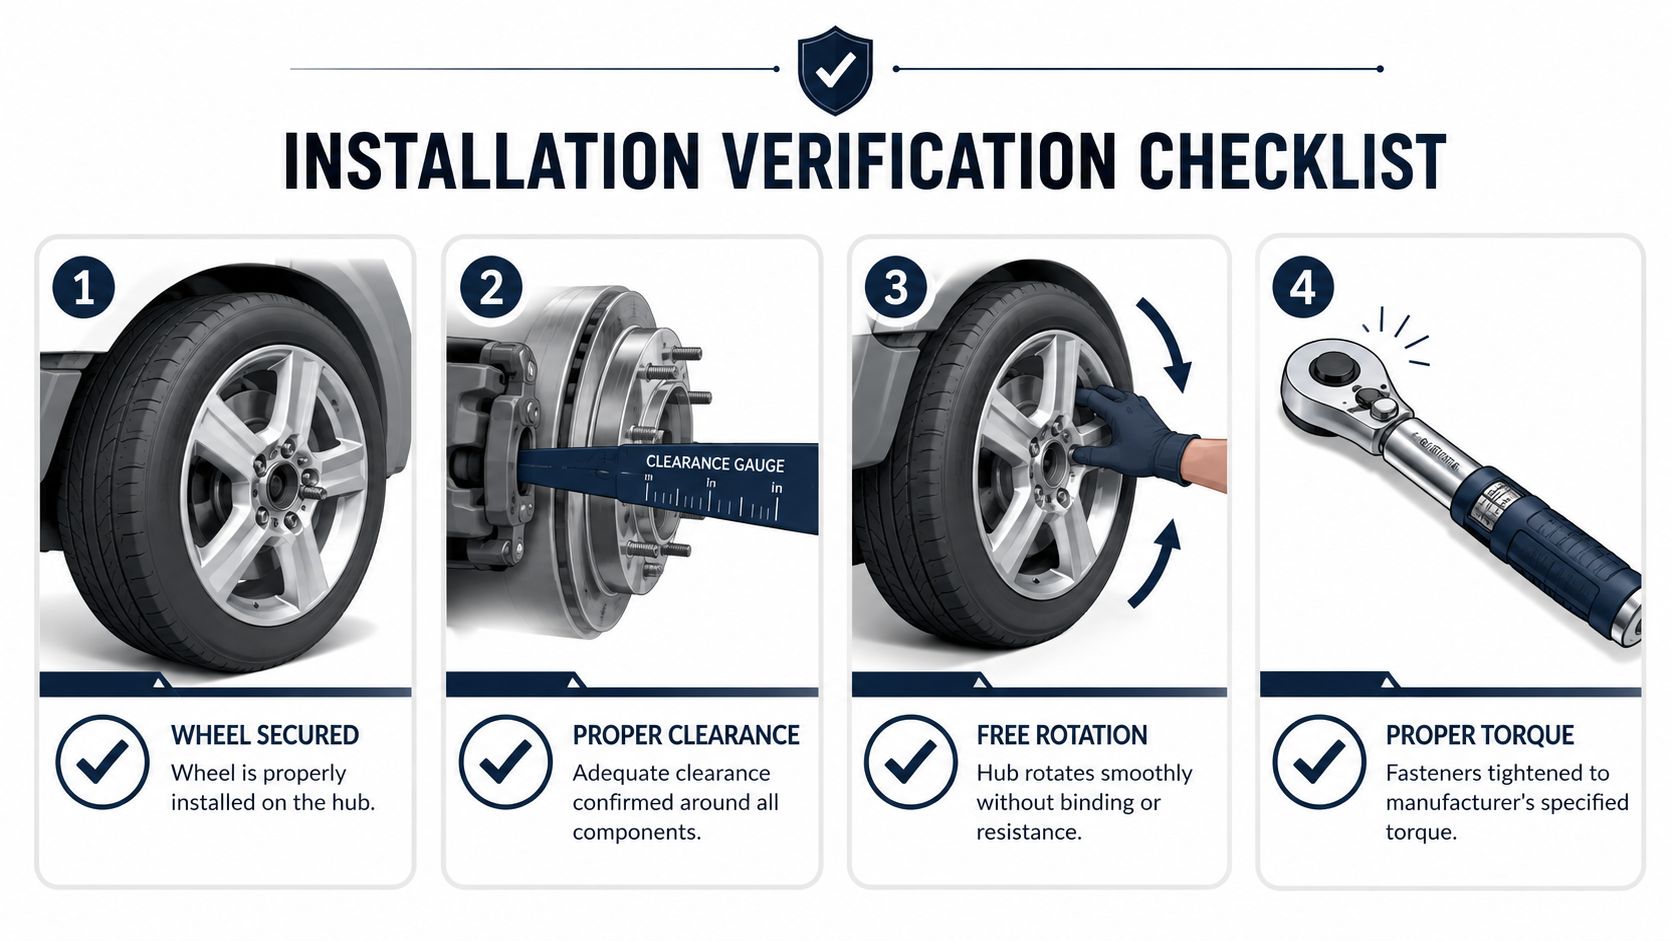
With the wheel installed and safely clear of the ground, rotate the hub or wheel by hand. It should turn freely without roughness, tight spots, brake interference, or detectable binding. Check for endplay using a dial indicator mounted against the rotor or hub face when the design uses tapered roller bearings. The specified inspection band may be 0.001 to 0.005 inches for such arrangements, and readings outside that band indicate that the setting requires investigation rather than acceptance (DT Components axle torque reference).
The post-assembly verification sequence
Measure movement. Position the dial indicator consistently and record the endplay result, not merely “checked.”
Assess rotation. Turn the hub by hand and listen and feel for roughness, drag, or a repeating defect pattern.
Inspect retention. Confirm the split pin, tab, stake, or locking collar is correctly engaged and hasn't been installed over damaged hardware.
Perform a controlled service check. At low speed, watch for binding, uneven brake drag, steering disturbance, or abnormal wheel-end heat after the first stop.
Document the work. Record the measured value, torque wrench serial number, calibration status, service date, hardware disposition, and any deviation from the standard task.
A hot hub fails verification even when the wrench clicked at the published value. Excessive heat can indicate over-preload, a damaged bearing, brake drag, seal interference, or lubricant failure. For torque-plus-angle joints where bearing settlement remains plausible, the work process may require a starting-torque recheck after an initial operating period. The service interval must come from the OEM or site engineering standard, not an invented universal distance.
The verification record becomes valuable during failure analysis. Bearing distress, seal damage, gear marks, and race discoloration can reveal whether the problem began with preload, contamination, alignment, or heat. A structured bearing, gear, and seal failure interpretation guide can help connect the physical evidence to the work history.
Common Mistakes and the Failure Modes They Create
Most recurring axle nut problems aren't random. They usually reflect a mismatch between the specified procedure and the actual condition of the hardware, bearing, spindle, or work process.
Over-torque can increase bearing drag, distort internal components, raise operating temperature, and accelerate grease and seal deterioration. Under-torque can permit race movement, hub wobble, fretting, thread wear, and progressive endplay. These failures may develop gradually, so the vehicle can return to service several times before the defect becomes visible.
Failure signatures worth recording
| Mistake | Likely mechanical result | Evidence to inspect |
|---|---|---|
| Excessive tightening | Bearing drag and heat | Discolored grease, seal wear, race distress |
| Insufficient tightening | Hub movement and retention loss | Fretting, brinelling, worn threads, spline damage |
| Reused locking hardware | Loosening under service load | Flattened locking feature, damaged stake, missing cotter |
| Skipped settling rotation | False preload indication | Endplay after service, uneven roller contact |
| Dirty or mismatched parts | Unstable clamp-load transfer | Corrosion marks, uneven contact, abnormal seating |
Thread friction deserves particular attention. A dry thread used against a lubricated OEM specification can produce a materially different clamp load from the intended condition. A contaminated, corroded, or mixed-metric assembly creates the same risk through a different mechanism. The displayed torque may look acceptable while the joint is either too loose or excessively loaded.
Escalation rule: A repeat axle nut complaint should trigger inspection of the spindle, hub, bearing, alignment, and work instructions, not another attempt to tighten the nut harder.
Skipped staking is especially dangerous on a staked-nut axle because the deformation is part of the retention design. A self-locking nut can also give a misleading torque reading after its locking element has been compressed through prior service. The maintenance record should identify whether hardware was new, reused under an approved rule, or rejected.
For technicians working on drive axles, a practical overview of component condition and service considerations is available in T1A Auto CV axle shaft advice. The useful lesson is broader than any single axle type. Inspect the complete load path instead of treating the nut as an isolated fastener.
When Recurring Axle Nut Issues Signal a Bigger Reliability Problem
Repeated loosening, recurring bearing replacement, and chronic endplay complaints indicate a system problem when they persist after the published procedure has been followed. A plant shouldn't classify each event as technician error until the evidence rules out spindle distortion, hub bore wear, bearing settlement, brake drag, alignment error, and inconsistent hardware control.
Define the escalation triggers
A reliability program should open a formal review when any of these conditions appears:
Repeated unit history. The same unit records three or more axle-nut events within 12 months.
Fleet pattern. Similar failures appear across a vehicle cohort, axle family, build period, or replacement-part source.
Unexplained bearing distress. Bearings show heat, spalling, or abnormal wear without obvious contamination or lubrication loss.
Post-service movement. Endplay returns after a documented adjustment and retention check.
Conflicting records. The work order shows the correct value, but calibration, hardware condition, or measured endplay wasn't recorded.
The investigation should begin with torque-wrench calibration logs, work-order history, thread-condition records, and the exact axle revision. Inspect spindle straightness, hub-bore wear, bearing seats, backing-plate runout, and wheel-end alignment with suitable measurement tools. Cross-check alignment records for the affected truck or trailer, then review vibration or oil-sample information from adjacent rotating components where those condition-monitoring routes exist.
A process trailer in a chemical plant is a useful example. If one trailer repeatedly develops hub movement after brake service, the investigation should compare its axle architecture, replacement hubs, brake adjustment, parking conditions, and technicians' records with unaffected trailers. The nut may be the visible symptom, while the actual cause is a worn hub bore, a bent spindle, or a service sequence that omits settling rotation.
The corrective action should include a formal root-cause failure analysis, an updated preventive-maintenance task, and a clear acceptance record for preload and retention. The axle nut then becomes a leading indicator of wheel-end health, not a standalone fastener to tighten after every complaint.
Forge Reliability can assess recurring axle shaft nut torque problems through failure analysis, condition monitoring, maintenance-process review, and asset criticality assessment. Visit Forge Reliability to request a free reliability assessment and identify whether the next action belongs in the torque procedure, the component specification, or the broader wheel-end reliability program.